Windows 11 下两种 CUDA 开发环境配置(wsl & 本地工具链)
环境准备
开始搭建环境之前,请确保当前电脑具备兼容 CUDA 的 NVIDIA 独立显卡,下面依次介绍基础环境的准备工作:
安装/更新 NVIDIA 最新驱动
首先,在 Windows 11 主机上安装或更新 NVIDIA 显卡驱动到最新版本,确保其支持 WSL2 CUDA。自 R495 驱动版本起,NVIDIA Windows 驱动已支持在 WSL2 中使用 CUDA。建议直接通过 NVIDIA 官网 或 GeForce Experience 更新到最新的生产版驱动(Windows 11 通常已经集成对 WSL2 的支持)。安装完成后,重启电脑以确保驱动生效。
验证驱动支持: 打开 Windows 的 PowerShell 或命令提示符,输入 wsl —version 验证 WSL 是否启用,然后输入 wsl -l -v 查看已安装的发行版列表和版本。如果 WSL2 已启用,且显卡驱动成功安装,我们可以在后续的 WSL Ubuntu 环境中运行 nvidia-smi 检查 GPU 状态。如果在 WSL 中运行 nvidia-smi 报找不到命令,可以尝试运行 /usr/lib/wsl/lib/nvidia-smi(WSL 环境下 NVIDIA 提供了该路径的实用程序)。正常情况下,应当看到 NVIDIA GPU 的信息以及驱动版本,表明 WSL2 已经识别出宿主机的 GPU。
安装并配置 WSL2 与 Ubuntu
安装最新驱动后,我们需要设置 WSL2 及 Linux 子系统环境。 在 Windows 11 中,WSL2 的启用和 Ubuntu 发行版的安装非常简便:
- 启用 WSL功能: 以管理员身份打开 PowerShell,执行命令启用所需组件:
dism.exe /online /enable-feature /featurename:Microsoft-Windows-Subsystem-Linux /all /norestart
dism.exe /online /enable-feature /featurename:VirtualMachinePlatform /all /norestart
然后重启电脑。Windows 11 也支持更快捷的方法:直接在 PowerShell 中运行 wsl —install 即可自动启用并安装默认的 Ubuntu 子系统。
- 升级 WSL 内核: 确保 WSL2 内核是最新版本。一般 Windows 11 会随系统更新推送最新的 WSL内核,也可以手动执行:
wsl --update核心需不低于 5.10.43.3 才支持 GPU 功能。可通过命令 wsl cat /proc/version 在 PowerShell 检查内核版本。
- 安装 Ubuntu 发行版:
# 查看可用的wsl发行版
wsl --list --online

# 安装ubuntu
'wsl.exe --install ubuntu安装完成后执行wsl命令进入ubuntu,对系统及进行基本配置。
完成以上步骤后,Windows 11 上的 WSL2 + Ubuntu 基础环境就准备就绪。
配置本地工具链与 CUDA 开发环境
在 Windows 环境下,我们可以选择两种方式来配置 CUDA 开发环境:本地工具链 和 WSL工具链。这两种方式都可以在 VSCode 中进行开发。接下来将介绍这两种配置方法。
本地工具链配置
本地工具链是指直接在 Windows 主机上安装并配置所有开发工具,包括 Visual Studio 和 CUDA 工具包。以下是详细步骤:
安装 Visual Studio 和 C++ Desktop 组件: 首先安装 Visual Studio 2022(推荐使用最新版本),并在安装过程中选择 Desktop development with C++ 工作负载,确保安装了 MSVC 编译器 和 Windows SDK 等组件。该工作负载会自动为你安装所需的 C++ 开发工具。
注意 :必须安装c++桌面程序组件,否则没有本地c++工具链
配置环境变量: 为了让 CUDA 编译器(nvcc)和 MSVC 编译器能够正常工作,需要将 Visual Studio 的 MSVC 工具路径添加到系统的环境变量 PATH 中。可以通过以下路径进行配置(请根据自己安装的vs版本进行调整):
C:\Program Files\Microsoft Visual Studio\2022\Professional\VC\Tools\MSVC\14.43.34808\bin\Hostx64\x64你可以手动进入系统环境变量设置,或者通过 PowerShell 执行以下命令来添加:
setx PATH "C:\Program Files\Microsoft Visual Studio\2022\Professional\VC\Tools\MSVC\14.43.34808\bin\Hostx64\x64;$env:PATH"**安装 CUDA Toolkit:**下载并安装 CUDA 12.9 的本地版本(cuda官方下载),确保安装路径为默认路径(通常为 C:\Program Files\NVIDIA GPU Computing Toolkit\CUDA\v12.9)。安装时,确保勾选 NVIDIA 驱动程序 和 CUDA Toolkit。安装完成后,CUDA 的 bin 目录会自动被添加到环境变量 PATH 中。
验证安装:
-
在本地编写hello.cu
#include<stdio.h> __global__ void cuda_hello(){ printf("Hello world from GPU\n"); } int main(){ cuda_hello<<<4,8>>>(); cudaDeviceSynchronize(); return 0; } -
powershell中运行
nvcc .\hello.cu -o hello进行编译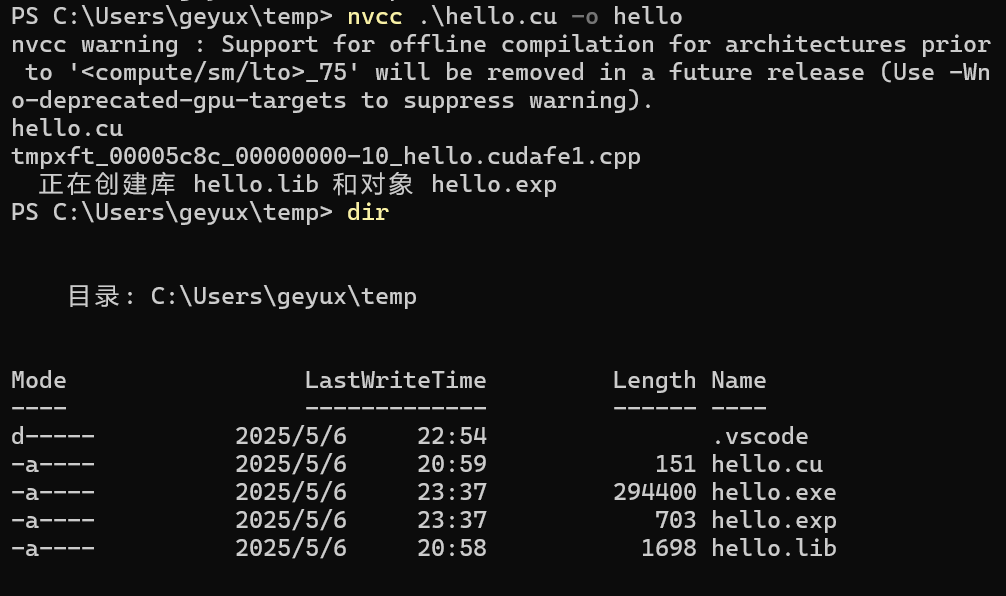
-
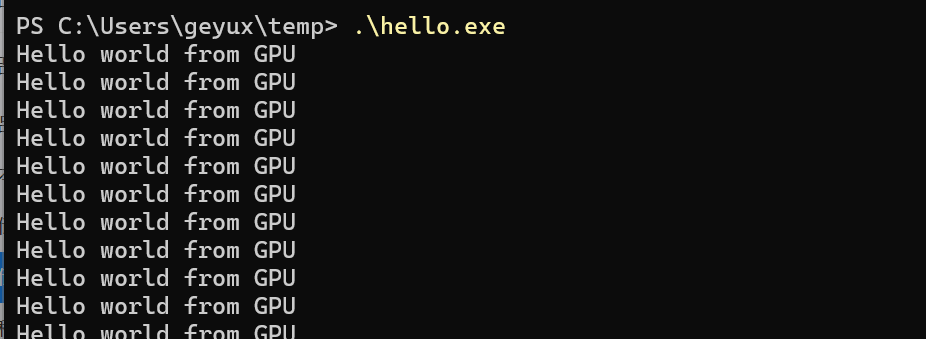
执行hello.exe程序
WSL工具链配置
如果你希望在 WSL2 中运行和调试 CUDA 程序,可以选择使用 WSL 工具链。下面是如何在 WSL2 的 Ubuntu 中配置 CUDA 开发环境:
- 安装 CUDA 工具包: 首先,在 WSL2 Ubuntu 中安装 CUDA 工具包。可以通过以下命令安装:
wget https://developer.download.nvidia.com/compute/cuda/repos/wsl-ubuntu/x86_64/cuda-keyring_1.1-1_all.deb
sudo dpkg -i cuda-keyring_1.1-1_all.deb
sudo apt-get update
sudo apt-get -y install cuda-toolkit-12-9-
验证 CUDA 安装: 安装完成后,运行 nvcc —version 检查 CUDA 是否安装成功。如果返回 CUDA 编译器的版本信息,说明 CUDA 已正确安装。

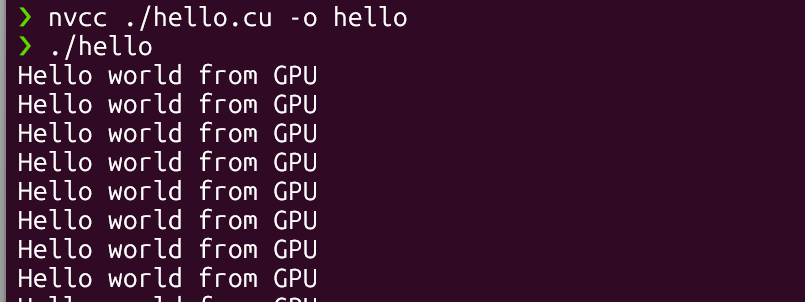
同本地验证,在ubuntu下创建hello.cu文件,执行编译命令
nvcc ./hello.cu -o hello
-
安装 VSCode 和插件: 在 Windows 上安装 Visual Studio Code 并安装 Remote - WSL 插件,这样可以在 VSCode 中通过 WSL 直接编辑和运行 WSL 内的代码。通过 Remote-WSL: New Window 命令打开 WSL2 中的文件夹并开始编辑代码。
结语
通过以上步骤,我们成功配置了 Windows 11 上的 CUDA 开发环境,并可以通过 VSCode 使用本地工具链或 WSL 工具链进行开发。本文暂时只做到使用vscode进行编辑,没有对调式进行配置,以后会有专文讲解几种主流IDE的cuda开发调试环境配置。无论你选择在 Windows 环境中使用本地工具链,还是在 WSL2 中使用远程工具链,都能够方便高效地进行 CUDA 开发,充分发挥你的 NVIDIA 显卡的计算能力。
脱敏说明:本文所有出现的表名、字段名、接口地址、变量名、IP地址及示例数据等均非真实,仅用于阐述技术思路与实现步骤,示例代码亦非公司真实代码。示例方案亦非公司真实完整方案,仅为本人记忆总结,用于技术学习探讨。
• 文中所示任何标识符并不对应实际生产环境中的名称或编号。
• 示例 SQL、脚本、代码及数据等均为演示用途,不含真实业务数据,也不具备直接运行或复现的完整上下文。
• 读者若需在实际项目中参考本文方案,请结合自身业务场景及数据安全规范,使用符合内部命名和权限控制的配置。Data Desensitization Notice: All table names, field names, API endpoints, variable names, IP addresses, and sample data appearing in this article are fictitious and intended solely to illustrate technical concepts and implementation steps. The sample code is not actual company code. The proposed solutions are not complete or actual company solutions but are summarized from the author's memory for technical learning and discussion.
• Any identifiers shown in the text do not correspond to names or numbers in any actual production environment.
• Sample SQL, scripts, code, and data are for demonstration purposes only, do not contain real business data, and lack the full context required for direct execution or reproduction.
• Readers who wish to reference the solutions in this article for actual projects should adapt them to their own business scenarios and data security standards, using configurations that comply with internal naming and access control policies.版权声明:本文版权归原作者所有,未经作者事先书面许可,任何单位或个人不得以任何方式复制、转载、摘编或用于商业用途。
• 若需非商业性引用或转载本文内容,请务必注明出处并保持内容完整。
• 对因商业使用、篡改或不当引用本文内容所产生的法律纠纷,作者保留追究法律责任的权利。Copyright Notice: The copyright of this article belongs to the original author. Without prior written permission from the author, no entity or individual may copy, reproduce, excerpt, or use it for commercial purposes in any way.
• For non-commercial citation or reproduction of this content, attribution must be given, and the integrity of the content must be maintained.
• The author reserves the right to pursue legal action against any legal disputes arising from the commercial use, alteration, or improper citation of this article's content.Copyright © 1989–Present Ge Yuxu. All Rights Reserved.